Renderings of the Pent Welding Fixturing, 1/31/03This page shows a design for the pent can welding fixturing that I dreamed up after discussing with Eric what he wanted to see. Please take a look and let me know if this is satisfactory. Click on the thumbnails to get an expanded image. You are welcome to download any of the images. If they are used for other than private viewing, credit to Bartoszek Engineering would be appreciated. Simple fixturing for welding Pent cans
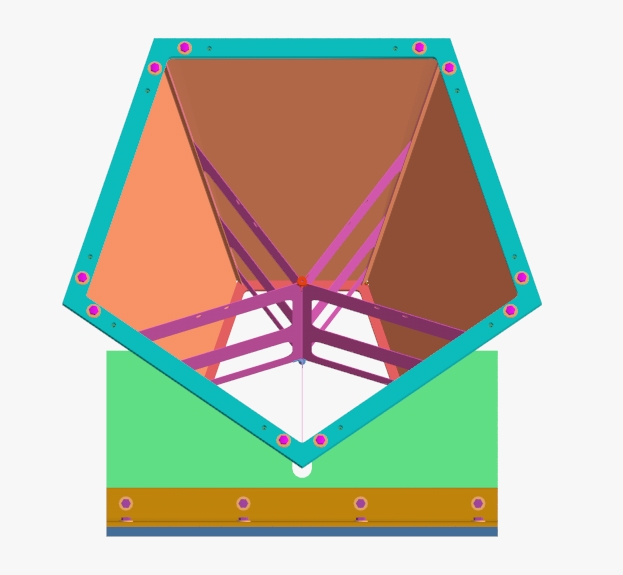
The welding fixturing for the pent cans should do exactly what was requested by Eric the welder, and maybe somewhat more. The idea is to create the overall shape of the can with two aluminum plates cut and drilled to bolt at both ends of the can. On the outside, the Rivnuts that hold the lid down are used, and on the inside ("inside" and "outside" refer to the faces that either face the interaction point or not,) 2-56 screws and nuts are used. This fixturing helps make sure that the fixed lid and inside plates' clearance holes will line up after welding because the welding fixturing forces those holes to be in the right place.
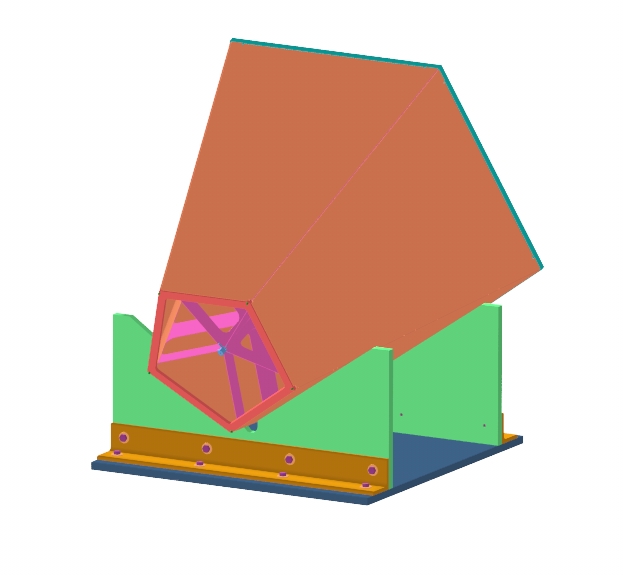
The fixturing is made from 1/2" thick aluminum plate. The angled surfaces that the pent can lays on are simple tapers. The weld line is horizontal for easiest welding. My biggest question is whether or not the welding torch fits inside the can with its hoses.
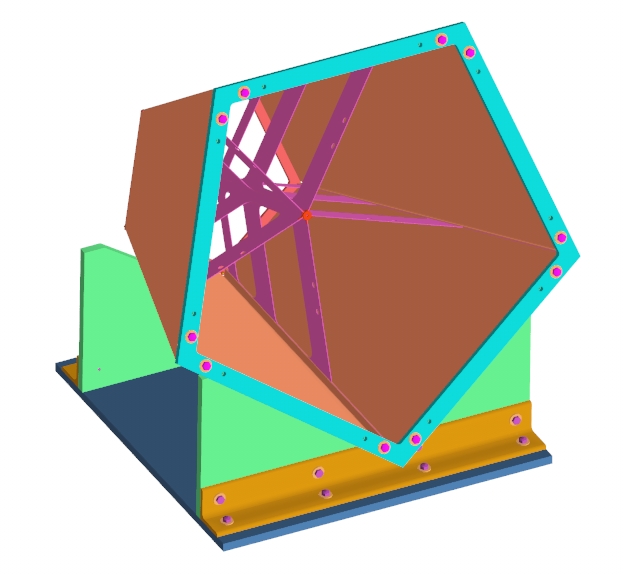
The pent can is not attached to the lower frame. Eric will be able to make a weld, pick the whole assembly up and rotate it to the next weld. He suggested welding two plates and adding another and another and so on, but my concern there is that the last plate may not go in the right place if they are not all jockeyed around together until all the bolts go in. Close-up of the inside face showing the first inside face fixture concept
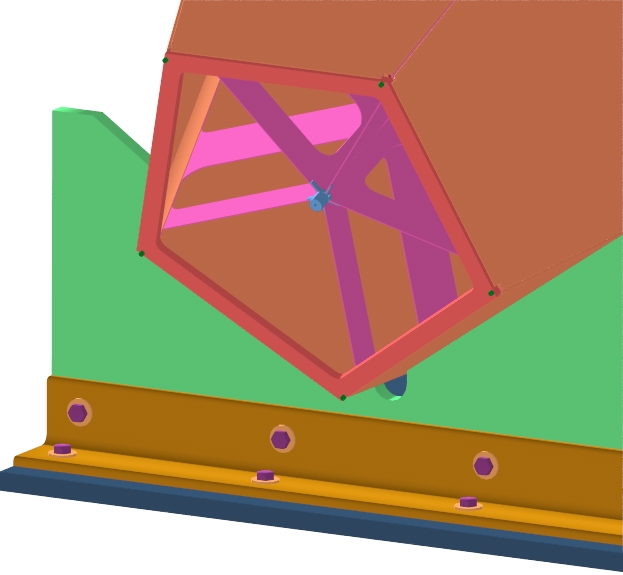
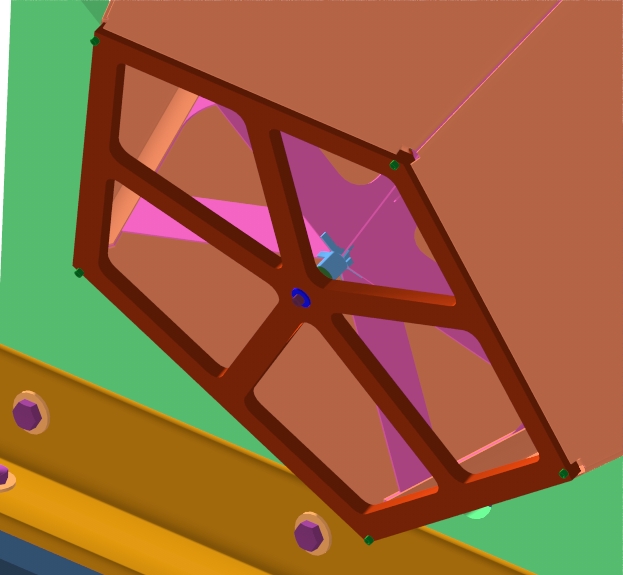
This was my first concept for the inside face weld fixture but I like the next one better. After I saw the whole thing together, I asked myself how the ribs are aligned and held to the outside bent sheets. To make sure the 4-40 bolt in the center hole of the inside plate goes in, it makes a lot of sense to have it there during welding as shown in the next picture. The ribs are supposed to be flush with the inside edges of the bent sheets so they can all be welded together. They do not protrude outside the side sheets and are slightly recessed at the corners, so they are hard to align from the outside. Once the 4-40 bolt is in and the other 2-56 bolts, the ribs are centered on the outside sheets. They just need to be checked for flushness on the inside and clamped before welding. Another idea to help fixture the ribs to the side walls
I like this design better. If there is a problem with it, let's talk. If Eric likes what he sees, then I will get these parts drawn up mas rapido and make a similar one for the hex can. Back to the MuLan Main Menu Back to the Bartoszek Engineering Home Page |